Showing posts with label old family recipe. Show all posts

Wednesday, March 31, 2010

South Carolina Mustard Sauce

Soon after I switched to a vegan diet, I made a list of my favorite foods that weren't originally vegan. My goal was to find ways to enjoy all of them in vegan form. Four years later, I'm about halfway through that list. Some things are beyond my cooking ability still (kolaches!). Some require vegan ingredients that just aren't quite good enough yet. And some, well, I just haven't gotten around to yet.

This South Carolina Mustard sauce is something my family ate every so often when I was a kid. Often my mother would ask me to make the sauce, and then she would cook the pork loin when she got home from work.

Unlike other barbecue sauces, South Carolina mustard-style barbecue sauce doesn't have any tomato products. They're usually based on a combination of vinegar, mustard, and sometimes brown sugar. The red color in this version comes from chili powder.

The barbecue sauce was nearly vegan already, but I was left with the dilemma of what to pour it over. I don't remember what pork tastes like (this dish and bacon were the only pork foods we ever ate at home when I was a kid). But when I made the courico tacos recently, I realized they were the perfect choice for this barbecue sauce.

I still need to perfect the cooking method for the soy curls, but the mustard sauce was just as I remembered it. Tangy, sweet, and just a bit spicy.

South Carolina Mustard Sauce

1 cup apple cider vinegar
2/3 cup sugar
1/2 cup yellow mustard
2 tablespoons chili powder
2 teaspoons pepper
1/2 teaspoon soy sauce
2 tablespoons Earth Balance

Combine the vinegar, sugar, mustard, chili powder, and pepper in a medium sauce pan. Simmer over medium heat for 10 minutes. Remove from heat source, and stir in soy sauce and Earth Balance.

Friday, December 18, 2009

How to Roast an Acorn Squash

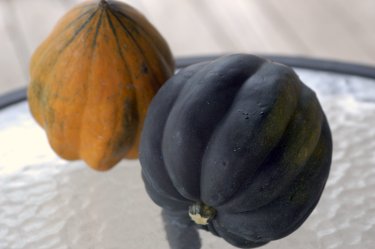
We finally got something besides greens and radishes in our CSA box. And rumor is that tomorrow's box will have potatoes! Acorn squash was one of the vegetables we ate a lot of when I was a kid. Even though it takes awhile for squash to roast in the oven, the easy prep work and clean up make this a great weeknight dish.

Step 1: Cut the acorn squash in half. You'll want to use a sharp knife for this. Start cutting at the end opposite the stem. Carefully work your knife through until the squash is only held together by the stem. Wiggle your knife a bit until the stem pulls off, sticking to one side of the squash.

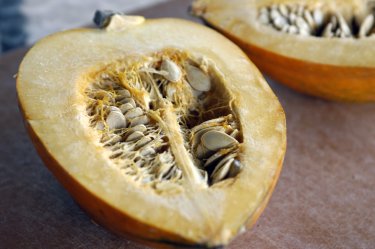
Step 2: Using a soup spoon, scoop out all the strings and seeds. You can separate the seeds later if you want to roast them. Don't worry if one or two strings remain. Eating the strings won't hurt you, it's just not the most pleasant texture.

Step 3. Drizzle the squash with a small amount of olive oil or put a small pat of EB in the cavity. Sprinkle with salt. You can also sprinkle a bit of brown sugar in the cavity at this point if you'd like. It makes a nice sauce with the squash juices and might encourage a reluctant squash-eater.

Step 4: Roast at 350-400 degrees for 45 minutes to 1 1/2 hours or until a fork easily pierces the squash. The amount of time the squash takes to cook depends on the size of the squash and the temperature of your oven. The squash cooks faster at the higher temperature, but I often cook something else in the oven at 350 degrees at the same time. Either temperature works.

What to do with the roasted squash?
1. Eat with a spoon. One half serves one person.
2. Add roasted nuts and a drizzle of maple syrup.
3. Scoop out the flesh, boil in vegetable broth, and then puree to make a soup. A bit of maple syrup is a nice addition to acorn squash soup.
4. Mash with a spoon and a bit of EB.
5. Use as a serving dish for grains like rice or quinoa.

Friday, October 9, 2009

Grandmothers and Brownies


The world would be a much better place if everyone had a grandmother like mine. She is my biggest fan. I never finish a call to her without hearing gobs of praise. No matter how mundane or off-track my life seems to me, my grandmother always deems it "creative" or "adventurous." Every call ends with her asking me, "Have I ever told you how proud I am of you?"

In a world where we can be very critical of ourselves and those around us, it's comforting to have someone to turn to who will always be in your corner. It would be a poor life if everyone around us only heaped praise. But it would be pretty poor, too, if we only poured on the criticism.

Food is like that, too. Green leafy vegetables, beans, and whole grains are important. But a diet shouldn't list too far to either extreme. We need room for the things that serve no other purpose than to make us happy.

These are the brownies I made as a little kid, from a recipe written on an index card in my grandmother's handwriting. In jr. high, I made these moist brownies at least once a week, sending them home with my best friend without even taking a bite. (Sugar was strictly forbidden for diabetics in the early '90s.) But something about the motions of baking just seemed right to me.

Last Thanksgiving I found out that this isn't my grandmother's recipe after all, but Katharine Hepburn's. But that's OK. It will always be my grandmother's recipe to me.


Katharine Hepburn's Brownies, Veganized

1/2 cup Earth Balance (or other trans-fat free margarine)
2 squares (2 ounces) unsweetened chocolate
1 cup sugar
1/2 cup pureed silken tofu
1/2 teaspoon vanilla
1/4 cup flour
1/4 teaspoon salt

Melt the chocolate and Earth Balance over a double boiler. Remove from heat and stir in sugar until well combined. Add the pureed tofu and vanilla and stir together. With just a few strokes, stir in the flour and salt. Spread the batter in a well-greased 8" x 8" pan. Bake at 350 for 40 to 45 minutes. Cool before cutting.

Monday, October 5, 2009

Popcorn

Popcorn is one of the best snacks around. Cheap, healthy, easy to make, and pretty diabetic-friendly. Although popcorn is pretty high on the GI scale, a cup only has 5g of carbohydrate, so it's not hard to fit into a managed carb diet. And it counts as a whole grain.

The popcorn in microwaveable bags might be convenient, but you don't need all those added chemicals just for convenience. Making popcorn "from scratch" isn't any harder.


Popcorn and a paper bag are all you'll need. One pound bags of popcorn can be found on the same shelves as microwaveable popcorn for about $1 a pound. This is one of those cases where the cheaper option is better for you.


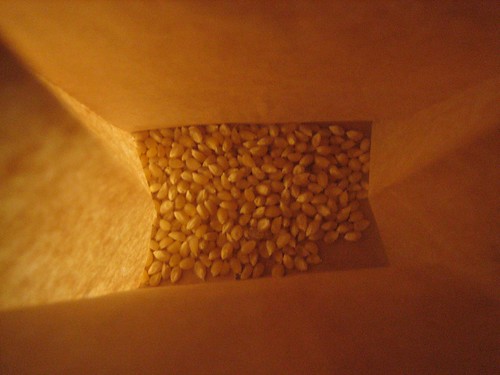
Pour your popcorn kernels into the bottom of the bag until they just cover the bottom.


Fold the top of the bag down. Alton Brown says you can staple the bag shut and the small amount of metal won't cause any microwave explosions. But really, that's not necessary. It's a waste of a staple; I've never had a bag unfold itself all the way in the microwave.

Place the bag in the microwave and set the microwave for 3 minutes. (There's no photo of this step, but you can imagine a microwave, right?) Stay within hearing distance of the microwave as the popcorn pops. When the popping slows down, stop the timer. For me this is usually around 2 minutes 30 seconds, but microwaves vary. The longer you leave the microwave running, the fewer unpopped kernels will remain. But you also risk giving the popcorn a faint burnt taste if you leave it in too long.


The bag expands a bit, but see, no popcorn explosions!


The angle is distorting this a little, but the bag is about 2/3 full now.


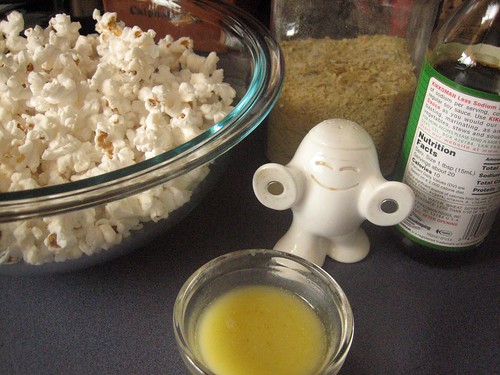
Pour the popcorn in a bowl. Choose a bowl that has more than enough room to hold all your popcorn, because now we're going to add our flavorings.

My favorite combo is Earth Balance (trans-fat free margarine), soy sauce, salt, and nutritional yeast. I mix the melted EB and soy sauce together beforehand so I don't end up with too strong of a soy sauce taste in any one handful of popcorn. Drizzle some liquid flavorings, sprinkle some dry flavorings, and repeat until you're through.

Thursday, October 1, 2009

Squash seeds and Vegan MoFo


Welcome to October everyone! It's getting to be fall. And one of the best parts of fall is roasting squash seeds. Everyone loves a snack that's salty, crunchy, healthy, easy to make, and practically free.

I have wonderful memories of carving a Halloween pumpkin with my mom and my brother. We crunched on the salty pumpkin seeds while arguing about how to make the scariest jack-o-lantern.

"Pumpkin" seeds don't just come from pumpkins, though. The seeds of any winter squash can be roasted. You know those boxes of processed foods that say "20% more free!"? Well this is the real 20% more free! For just a tiny bit more work, you get a second dish from your winter squash. It's even better if you're roasting the squash because you already have the oven on.

Here's the loose recipe I used growing up. You can change the oven temperature if you have something else cooking that needs a higher temperature. Just expect the seeds to brown a bit faster.

Roasted Squash Seeds

Separate the seeds from the pulp of the squash. Don't worry if tiny bits of pulp stick to the seeds. Just be sure to remove the larger pieces. Throw the pumpkin seeds in a baking dish with sides. Drizzle a small amount of oil over the seeds. (We always used canola, but olive oil would work fine.) Sprinkle the seeds with kosher salt. (Kosher salt is extra crunchy.) Bake the seeds in a 200 degree oven until browned. This will take about 20 minutes, but keep an eye on the oven. The seeds can go from browned to burnt really quickly.

Reason number two why October is going to be a great month: Vegan MoFo III! Vegan MoFo is the Vegan Month of Foods. For the month of October, bloggers all over the world who are interested in vegan food have pledged to post, post, post. Over 300 bloggers will flood the Internet with blog posts showing glimpses of their food worlds, from tonight's dinner to inspiring new food ideas.

Tuesday, September 22, 2009

Favorite childhood breakfast


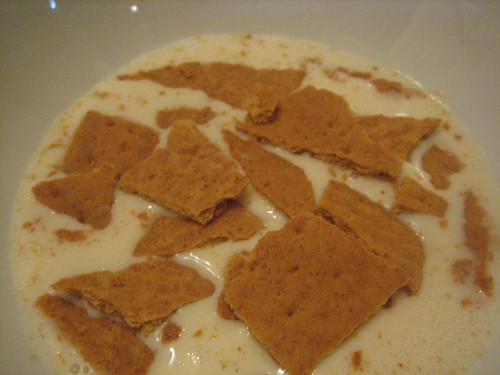
I think every family has a few unique food traditions. This was one of my favorite breakfasts when I was a kid. It's simply a bowl of broken up graham crackers with a glass of milk poured over it. If you wait until the last minute to pour your glass of milk over the crackers, you get a great combination of soft and crispy graham crackers.

Graham crackers are made with whole grains. With only 26 g carbohydrate* in a bowl of graham cracker "cereal," this is a great, quick diabetic breakfast.

*includes a glass of unsweetened soy milk

Wednesday, July 23, 2008

Ratatouille


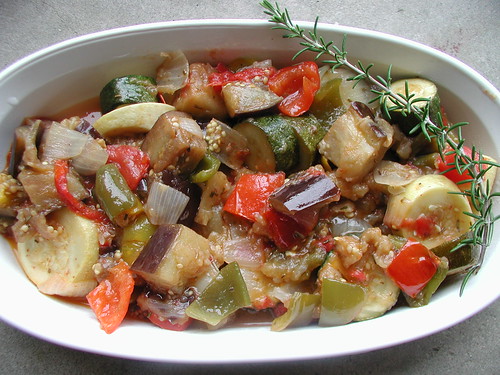
I once told my mom that she only made two vegetable dishes: stir fry and ratatouille. And the only difference between the two was that the ratatouille had tomatoes. My mom didn't find this funny.

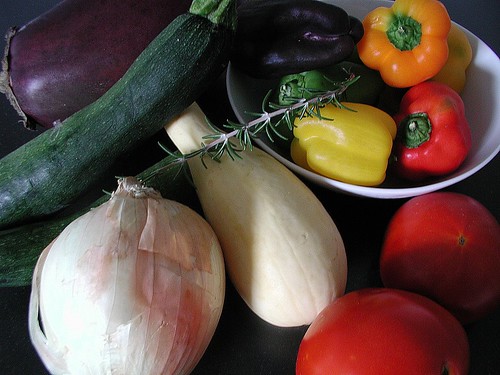
And of course, I've inherited a lot of my mother's cooking style. She may have been right about this one. (Don't tell her I said that though.) This family recipe is another one of those 'throw a bunch of things in a pot and let it cook' types. The beauty of this Mediterranean peasant dish is that all of the ingredients grow at the same time. All of the vegetables in this dish can be found in my parents' garden (probably why it showed up so often). As an apartment dweller, I don't yet have a garden, but I found all of these vegetables at my farmers market (and I snagged the rosemary from a bush outside the museum. Shhh!)


Ratatouille

1 onion, chopped
1 medium eggplant, chopped
3 summer squash, a mixture of zucchini and yellow squash, sliced into rounds
2 tomatoes, chopped
6 mini or 2 medium bell peppers, assorted colors, chopped
2-4 garlic cloves, smashed
1/2 cup olive oil
rosemary (and/or oregano, thyme, marjoram, chervil, or basil)

Combine all the ingredients in the largest pot or sauce pan that you have. Simmer uncovered (don't brown) on medium low for 45 minutes to an hour, until everything is soft. Stir occasionally. The eggplant will be the last to soften. By the time the eggplant is ready, the tomatoes and the onions will have almost disintegrated.

That's it! Use what vegetables you have on hand. My mom sometimes adds mushrooms.

Other eggplant recipes
Eggplant dip
Spicy eggplants

Sunday, July 20, 2008

Eggplant dip


When I was learning to cook in college (not what I went to college for!), one of the things I did was keep a recipe box just for vegetables. I made it a goal to find five recipes I liked for each vegetable. I never got to five for everything, but I developed a good pile of recipes and ate a few more vegetables than I would have otherwise. Now that I've discovered some new vegetables (kale) and I'm trying to cook more seasonally, I've decided to revive the practice. So starting now, five recipes for eggplant.

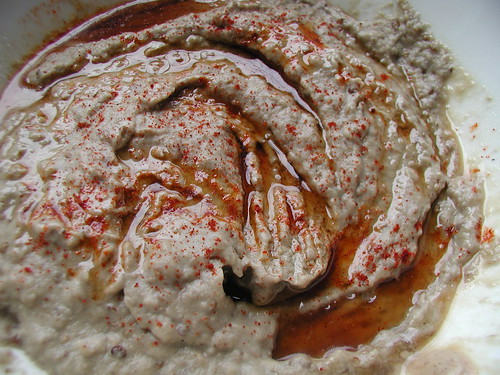
Eggplant is one of the things my parents usually plant in their vegetable garden. And this eggplant dip, similar to baba ghanouj, is something my mom made often.

Roasted Eggplant Dip
1 medium eggplant
4 cloves garlic
4 tablespoons olive oil
1 tablespoon sesame oil
salt
cayenne pepper

Cut the eggplant in half lengthwise. Separate the garlic cloves from the head of garlic, but don't remove the skin from the cloves. Place the eggplant and garlic in your roasting dish and drizzle a tablespoon of olive oil over them. Roast at 350 degrees until the eggplant and garlic are soft, stirring once or twice. The entire process will take 45 minutes to an hour depending on how big your eggplant is. The garlic may finish earlier. If so, remove the cloves and set aside.

When the eggplant is soft, remove from the oven. Scoop the eggplant flesh from the skin and squeeze the garlic from the skins. Combine the eggplant flesh, garlic, and remaining olive oil in a food processor and process until smooth. Salt to taste.

Place the eggplant in a bowl, drizzle with sesame oil and sprinkle with cayenne.

Other eggplant recipes
Spicy Eggplants

Thursday, June 26, 2008

Potato Kugel


Another day, another kickball dinner, another kugel.

When I told my mother I made her potato kugel she said, "Did you make it right?"
"What do you mean?" I stalled.
"Did you make it in a muffin tin?"
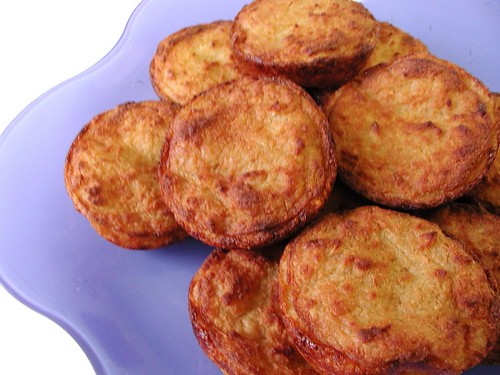
"Of course I did!" I sighed in relief. She forgot to ask the other question. According to my mom, when making her potato kugel, one must always cook it in a muffin tin, not an ordinary casserole dish. And one must grate the potatoes by hand.

Grating five potatoes by hand doesn't sound so bad. But then there's that onion you have to grate, too. The crying! And you have to grate so fast. The potatoes start to turn pink, then brown, then black. Faster, faster, my mother goads.

So, if my mom isn't looking over your shoulder, go ahead. Use a food processor.

Potato Kugel
4-6 medium potatoes
1 medium onion
1 tablespoon non-dairy margarine, melted
3 tablespoons flour
1 tablespoon nutritional yeast (or another tablespoon flour)
1/2 cup silken tofu
salt

Preheat the oven to 400 F. Spray a muffin tin with cooking spray (or oil thoroughly). Chop the onion and process in a food processor (or grate by hand). Add the tofu to the processor and process until combined. Add 1 tablespoon melted margarine. Set aside.

Working quickly, peel and roughly chop the potatoes. Process in the food processor. If you must do this in batches, cover the pureed potatoes with plastic wrap and refrigerate to keep from turning brown.

Mix together the potato, onion-tofu mixture, flour, nutritional yeast, and salt to taste. Fill the oiled muffin tin with the batter. The kugel doesn't rise much, so you can fill the cups nearly to the top. Bake for 1 hour or until the tops are browned.

EDIT. If you want to make these for Passover, sub matzah cake flour (ideally) or matzah meal for the flour.

Tuesday, April 15, 2008

Toffee bars

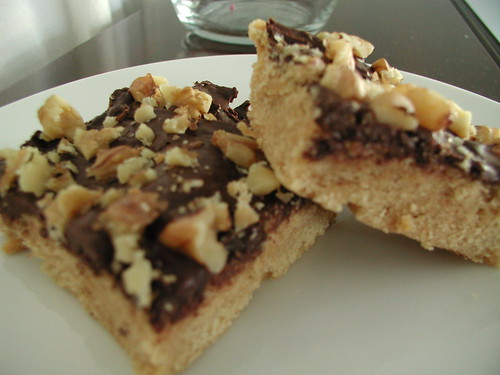
These bars are a beloved family tradition passed on to me from my mother who got the recipe from her mother who probably got it from a newspaper or magazine. Or maybe the back of bag of chocolate chips. But three generations in the U.S.? That's tradition. After this weekend, I can now testify that they even taste good when baked on a Wednesday in one state and consumed on a Sunday in a different state. Magic.

When I cook, there's one thing I always keep any eye out for: dishes. Any recipe change that lets me spend less time washing dishes is an improvement for me. So this method is slightly different from the way my mom (and grandmother) make it, but they'd never know it.

A Lazy Person's Toffee Bars
1 cup non-dairy margarine
1 cup brown sugar
2 cups flour
1 teaspoon vanilla
3 drops maple or rum flavoring OR 1 tablespoon maple syrup
6 oz semi-sweet chocolate chips
3/4 cup walnuts

Combine margarine and sugar in a bowl. Mix in flour and flavorings (or syrup). The batter will be dense. Spread in a pan and smooth with a knife or the back of a spoon. Bake at 350 for 25 minutes. Sprinkle the chocolate chips over the top of the bars and bake an additional 5 minutes, or until the chocolate is spreadable. Take the bars out of the oven and quickly smooth over the chocolate. Crumble the walnuts evenly over the chocolate. (A less lazy person might use pre-chopped walnuts.) Refrigerate the bars until the chocolate cools enough to maintain its shape (about 15 minutes). Cut and serve.